Monday, 13 January 2014

Blurred Lines

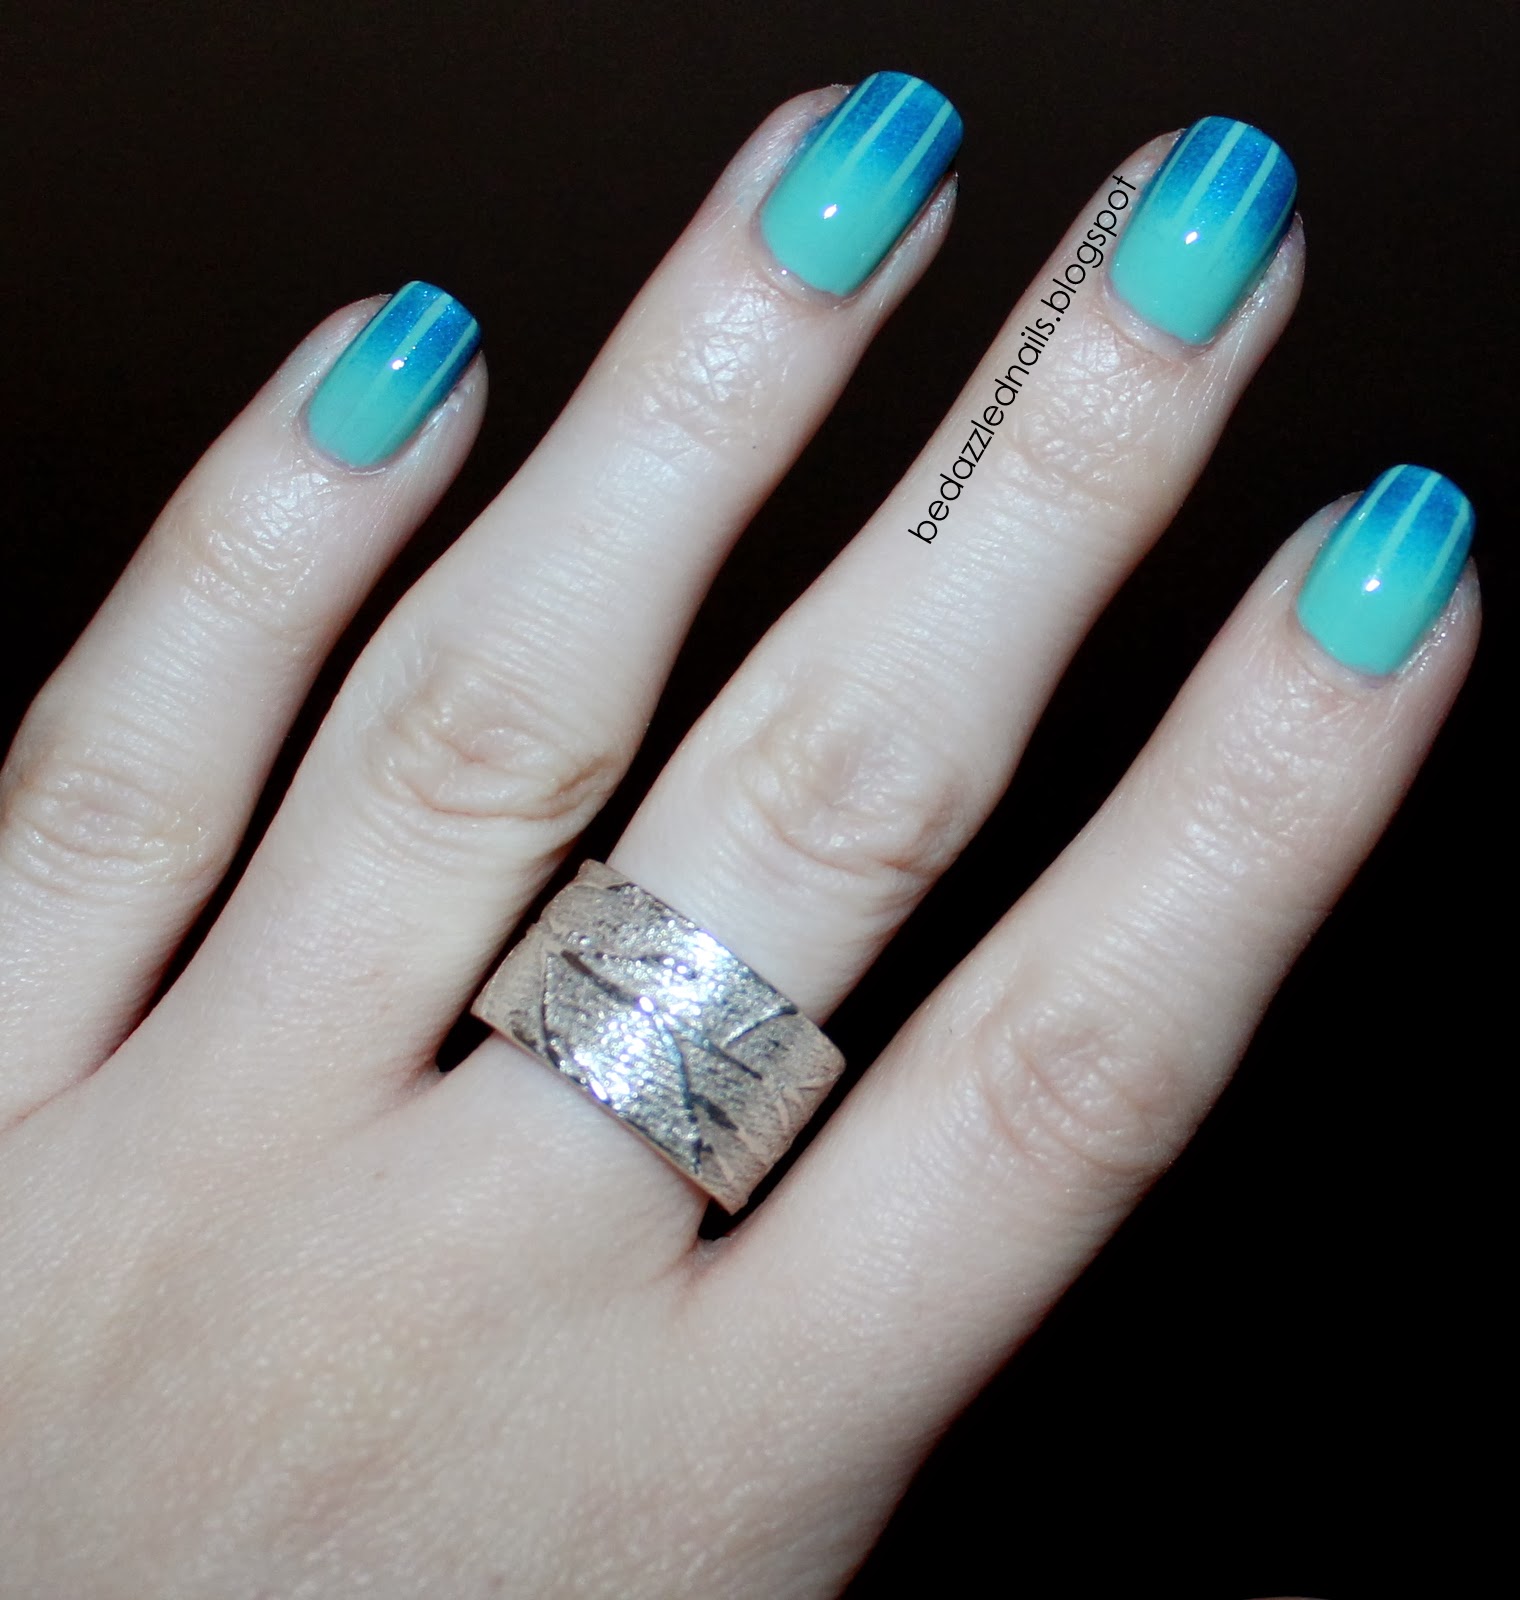
So I decided to continue my obsession with my new striping tape and create another line-tastic design.  I'm a big fan of ombre/gradient and I hadn't done one in a while so why not combine stripes and ombre to create an awesome design?  When I decided on this design, I immediately wanted to call it Blurred Lines.  As a result, I've had the song "Blurred Lines" stuck in my head for days!
Ok now let's get down to business.  For this design I used "Turquoise & Caicos" and "Aruba Blue" by Essie.
I started with a base of "Turquoise and Caicos".  I absolutely love this colour!
I then placed pieces of striping tape vertically on my nails.  Using a make-up sponge, I sponged "Aruba Blue" just onto the tips.  From the picture above, you can see that I actually sponged both colours just to make sure my ombre blended well.  The Posh Knot has a great tutorial for how to create an ombre/gradient effect on your nails.  Here is the final product!
I'm really happy with how they turned out and even happier with the fact that they didn't take long to do (I painted the base colour the night before).  There are so many possibilities for this design with different colour combinations and striping tape arrangement.

Happy Painting!

Love, Kate xo

Tuesday, 7 January 2014

First Striping Tape Design

My striping tape arrived!! I'm absolutely in love.  It is so much easier than trying to cut up tiny strips of Scotch tape.  I got my striping tape from Amazon.ca (thank you mom for the awesome Christmas gift!).  Striping tape is rather in expensive.  I got 30 rolls of tape for around $3.00 and there is a nice variety of colours.
So I obviously had to put my new tape to use right away.  I searched for some inspiration on Pinterest but just decided to go with the flow and see what happened.  On my first attempt, I really liked the pattern I made, but I didn't wait long enough for the base colour to dry so the tape peeled off some of the paint and just made a mess.  On the second attempt, I painted my base colour and didn't do the design until the next day.  This meant there was no risk of my polish peeling off with the tape! 
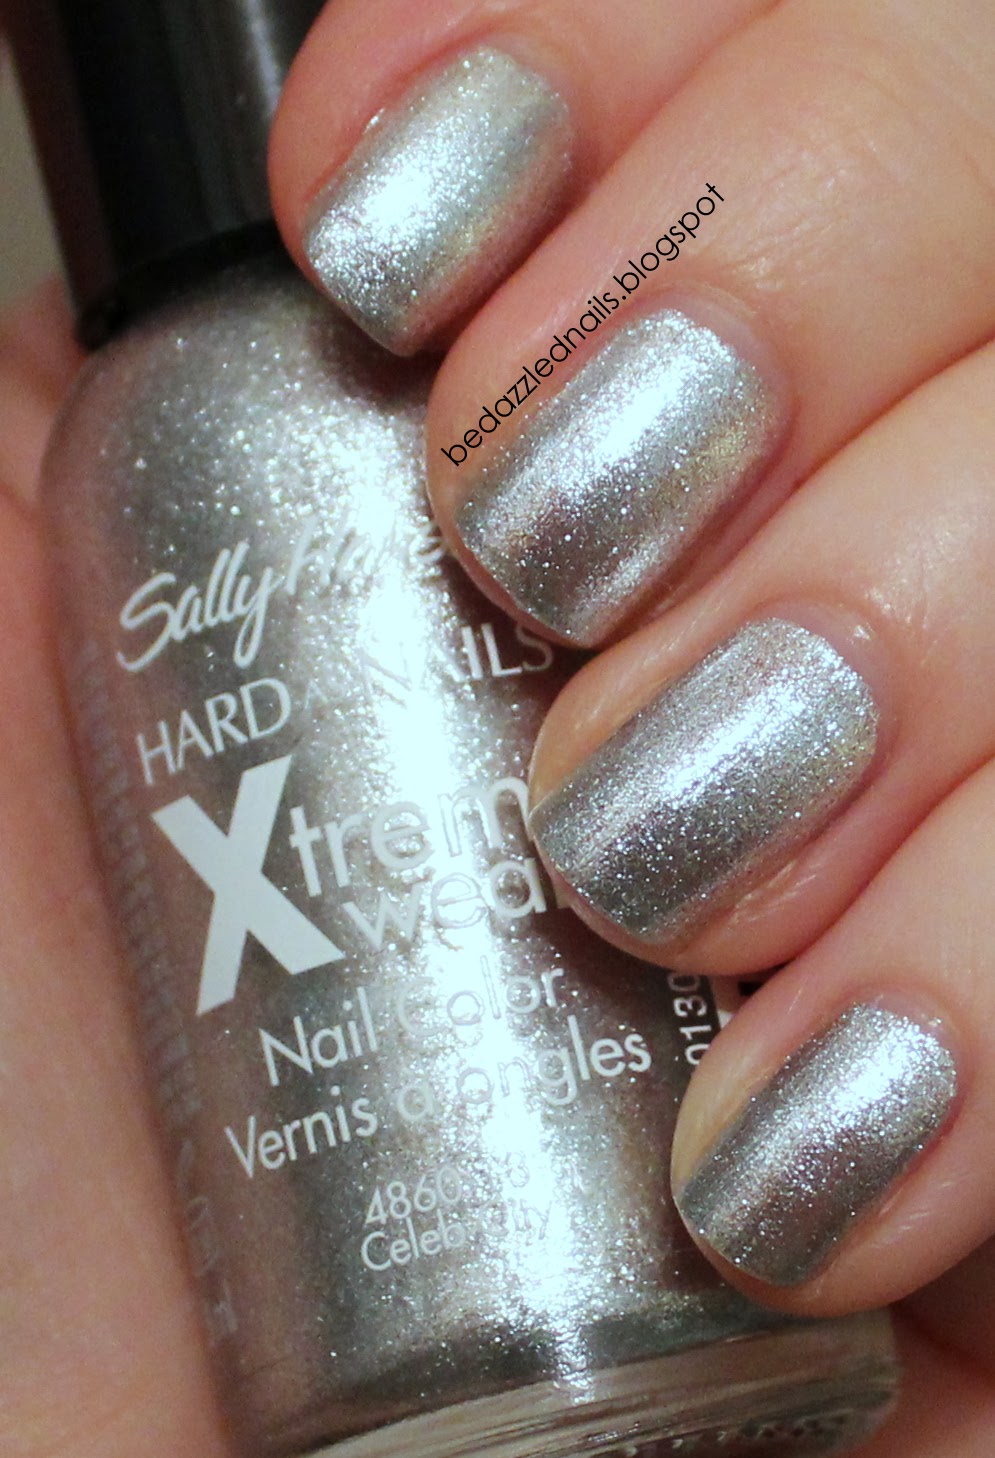
For this design, I used Celeb City by Sally Hansen and Wicked by Essie (an awesome Christmas gift from one of my students!).
I started with Celeb City as my base.  This is probably one of my favourite polishes because it goes on so well.  Since the glitter in it is so fine, it comes off easily unlike other sparkly polishes.
I then used 4 strips of tape to create a crisscross design on the tip of each nail.  You need to make sure that your tape is long enough to hang over the nail to make it easier to remove.
I then painted my top colour (Wicked) over top of the tape.  The key to getting nice straight lines is to remove the tape while the paint is still wet.  After I removed the tape, I decided to fill the purple spaces with dots using one of my new dotting tools.  Here is the final product!
 When I put my top coat on, the purple smeared a little bit.  I ended up not minding the smears because it gave the silver a slightly purple tinge.  It's only noticeable upon close inspection.
I can't wait to try out some more designs with my striping tape!

Happy Painting!

Love, Kate xo

Friday, 27 December 2013

I'm Back!!/Christmas Sweater Nails

The past couple months have been much busier than usual.  Between school, an online course, Christmas, and the arrival of my niece, nails have kind of been put on the back burner.  When I did get a chance to do my nails, they were unsuccessful design or didn't photograph well.  Perhaps one day I'll post some of my nail art failures!

So now that my course is done and Christmas is over, I expect to be back posting on a weekly basis.  You'll notice I've switched things up a little on the blog.  I thought it could use a new background.  What do you think?

Ok, now let's get back to some nails designs.  I know that Christmas was technically 2 days ago but I don't think it's too late to post a Christmas design.  For Christmas I got a set of nail art brushes from Amazon (thanks mom!).  The brushes are by Bundle Monster and based on my initial use of them, I really like them.  A proper striping has seriously been missing from my life!
At Christmas time, I'm always drawn towards Christmas sweater nails.  For this design, I used Blanc by Essie (base colour), dark green acrylic paint, and crimson red acrylic paint.  I used a striping brush, a small detailing brush, and a dotting tool (a real one!).
 I then used the acrylic paints and brushes to create my design.  I chose to keep each nail similar with an accent nail (Christmas tree).  Here is the final product!
I LOVE how they turned out!  
I can never get enough of a good Christmas sweater design.  Here is the sweater design I did last Christmas.
I'm very happy to be back and can't wait to create some fun designs with my new brushes and striping tape (still in the mail).

Happy Painting!

Love, Kate xo


Monday, 4 November 2013

Black and White Chevron

So my plans to do a second Halloween design went out the window because on Oct. 30 I became an aunt!! Baby Bailey had us all wrapped around her finger from the moment she was born.  You can guarantee that her auntie will be doing her nails when she is old enough ;)

For my nails this week, I was kind of inspired by the Ikat Chevron nails I did a while ago.  Within the last few days, they have been re-pinned several times on Pinterest and it reminded me of how much I liked them.

For this design, I used "Blanc" by Essie, "Black Satin" by Rimmel,  and "Black" by Kiss.  I started with a base of "Black Satin" with "Blanc" on my accent nail (ring finger).  
I then used the fine brush from my Kiss polish to make the design.  I found that I made my stripes too far apart so I filled in the space with white dots.  Here is the final product!
It would be a fun design to try with different colours.  The original Ikat Chevron I did is still my favourite. :)

Happy Painting!

Love, Kate xo

Wednesday, 23 October 2013

Halloween Patchwork

I always love when there is a theme that I can work my design around.  With Halloween coming up, it seemed very appropriate to do a Halloween themed design.  I'm trying to get an early start so that I can do another Halloween design next week.  When searching Pinterest for ideas, I came across a Halloween Patchwork design by Sam at nailasaurus.com.  I loved the colours that she used but I didn't want to make mine exactly the same.  So I started thinking about what other colours Halloween brings to mind.  I immediately thought of Candy Corn (white, yellow, orange).  For this design I used "Blanc" by Essie, "Orange Oasis" by Covergirl, and "Hit the Lights" by Nicole by OPI.  I used black acrylic paint and a thin paint brush for the stitch detail.
 
I started with a base of "Blanc" by Essie.  I had a bit of a brain fart and forgot to take a picture of just the base. Oops!!
I used tape to make the "patches" (Sam's tutorial is great).  The key is to do thin coats of polish so you get nice straight edges and faster drying times.  If you have a steady hand, you can always hand paint the patches without tape.  I then used my acrylic paint to make the stitches.  I wanted to use a black Sharpie but none of the ones I own have a pointy enough tip.  Remember that if you do use Sharpie, spray a thin coat of hairspray on your nails to prevent the marker from smudging when you apply your top coat.
Here is the final product!
It would be fun to try different colours for different seasons!  

Happy Painting!

Love, Kate xo

Monday, 14 October 2013

Falling Leaves

For the last couple weeks I've been trying to decide how to incorporate leaves or falling leaves into a nail design.  I really wanted to keep it simple with no actual leaves or trees. 
For this design I used, "Pur White" by Maybelline, "The Spy Who Loved Me" (red) by OPI, "Orange Oasis" by Covergirl, and "Hit the Lights" (yellow) by Nicole by OPI.
I started with a base of "Pur White".  I wanted the base to be really soft and felt that a straight up white polish would be too harsh.
I then used my dotting tool (pencil with a straight pin) to add dots to my nails starting at the tips.  I tried to spread the dots out as I moved down my nails to give a falling/fading effect.  Here is the final result!
I am in LOVE with how these turned out.  
The possibilities are endless with this design.  
To name a few ideas:
- blue, silver, and white for Winter (falling snow?)
- red, green, and gold for Christmas
- multi-coloured for New Years (confetti)

Happy Painting!

Love, Kate xo

Saturday, 12 October 2013

Thanksgiving Plaid

Since it is Thanksgiving this weekend in Canada, I figured I should do a Thanksgiving themed design.  I'm kind of in love with the plaid trend in fashion right now and have been wanting to do plaid nails for a while.  So instead of doing a traditional turkey on my nails, I went with a plaid design in Fall colours.
For this design I used "Black Orchid" by Sally Hansen, "Blanc" by Essie, "Orange" by Pupa, and "Goldeneye" by O.P.I.  
I started with a base of "Black Orchid".
I got my inspiration from a tutorial created by The Beauty Department.  I painted Scotch Tape and cut it into different sized strips.
I then placed the strips on my ring finger in a plaid design.  On my other nails I added metal stud stickers by Kiss.
Here is the final product!
I hope all my Canadian friends have a wonderful Thanksgiving weekend!

Happy Painting!

Love, Kate xo