Sunday, 26 May 2013

Neon Dots

I was feeling rather uninspired and overwhelmed tonight.  Sometimes there are so many designs that I want to try that I just can't settle on one and I get discouraged.  I decided to do my "go-to" design of dots.  For this design I used "White On" by Sally Hansen, "Funky Limelight" by Essie, "Bikini Pink" by Kiss, "Beach Green" by Kiss, and "Neon Orange" by Kiss.
Whenever using neon colours, they will be brightest if they are on a white base.
Next, I used my dotting tool (pencil with a straight pin in the eraser) and went to town making dots.  I alternated the centre colour so that each nail was slightly different but kept the same colour pattern.  The final product is a fun, vibrant design that is perfect for summer.
Happy Painting!

Love, Kate xo

Monday, 20 May 2013

Freehand Geometric with an Ombre Base

I'm a really big fan of ombre nails.  I particularly like adding some sort of pattern on top.  For these nails, I started with a base of "Green with Envy" by Sally Hansen.
To do the ombre base I used a make up sponge.  I placed a dot of each colour next to each other on a plastic bag.  I then dipped my sponge into the paint and applied it to my nails.  I more or less used the same strategy that can be found at The Posh Knot (http://theposhknot.com/blog/?p=322).  For the blue I used "Blue Me Away" by Sally Hansen.
I then decided to add a geometric pattern over top of the ombre in black by Kiss Nail Art Paint.  I'm REALLY happy with the final result!  What do you think?
I've been doing my nails for years now, but since I just started blogging, I've got photos of nail designs that I have done in the past.  Unfortunately, I don't recall the colours I used but here are a couple other ombre designs that I have done. 
Happy Painting!

Love, Kate xo

Thursday, 16 May 2013

New Colour - Pale Pink

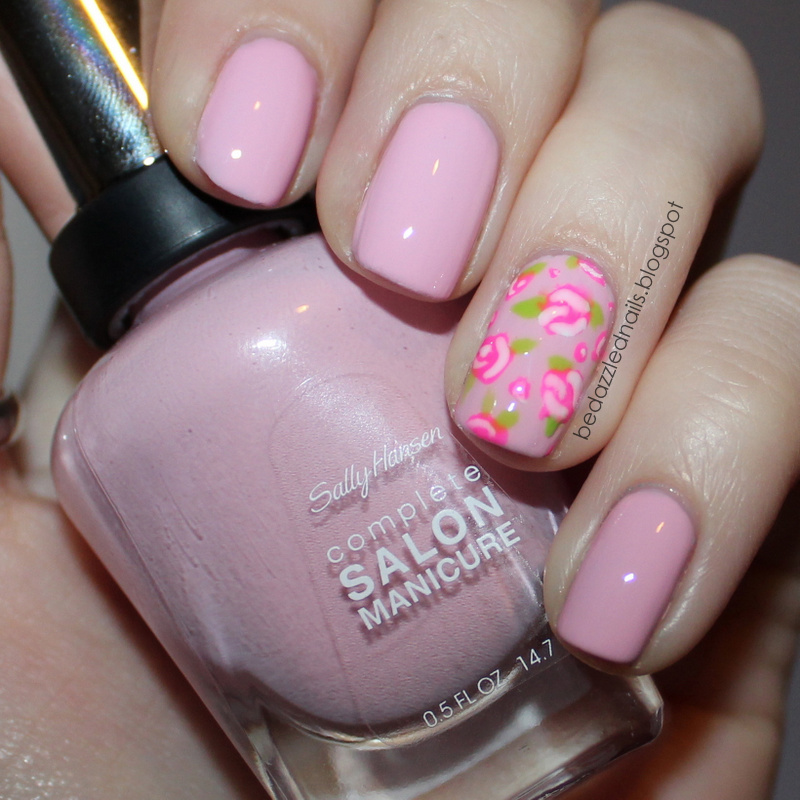
Last weekend I bought 3 new colours (the first 2 can be seen in my last post).  I'm forever on the search for the perfect pale pink shade.  The difficulty with pale pink (and any pale colour) is the number of coats you need to get perfect coverage.  For this polish I needed 3 coats to get it the way I wanted.  Overall I'm very happy with the colour.  It's the perfect, delicate, girly colour.  The colour is "Pink a Card" by Sally Hansen Complete Salon Manicure. 
I wore just the pink for a day before I decided to add an accent nail.  I'm a big fan of florals so I did a simple freehand 'rose' design using Kiss Nail Art Paint.  I think next time I might use acrylic paints for the rose design in order to blend the colours a little more.
Happy Painting

Love, Kate xo

Saturday, 11 May 2013

Colourful French Manicure

I'm a big fan of two-toned french manicures.  I love that it is the complete opposite of a traditional french manicure.  Earlier in the week I did a grey and red/orange design.  I used "Warm Red" by Barelements and "Grey Matter" by Rimmel.
I used the grey as my base.
To do the tips I used the strips that come with any french manicure kit.  Here is the final result!  I love the look and I think most colours would look good against the grey.
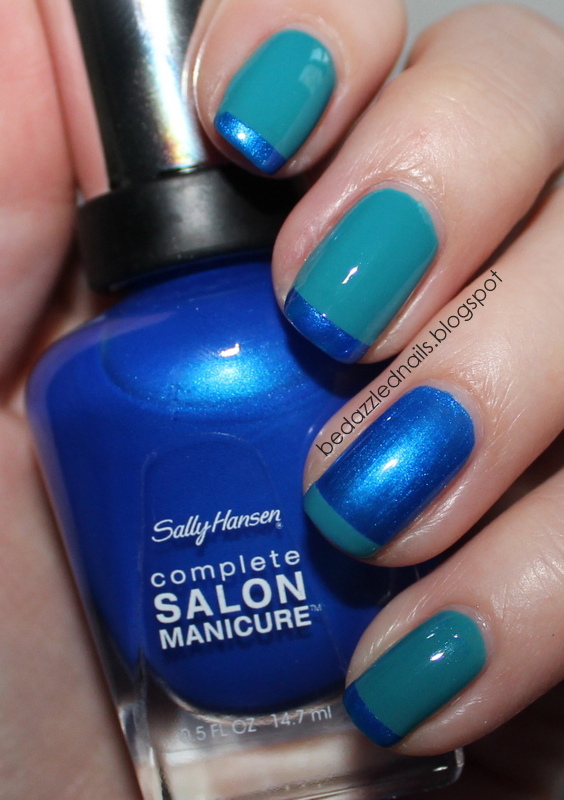
On Friday, I bought three new polishes.  I immediately decided that 2 of the colours would be perfect together for this type of design.  So of course I had to give it a try! (I'll show off the third polish soon!).  I used "Please See Me" and "Blue My Mind" by Sally Hansen.  I love how smooth these polishes go on.
 This time I decided to do my ring finger as an accent nail and flipped the colours.
Again, I used french manicure strips to do the tips.  Here's the final result!  These colours are seriously gorgeous (on their own and together)!
Happy Painting!

Love, Kate xo

Monday, 6 May 2013

Double Post: A New Polish and Dotted Toes

I was missing a really vibrant blue in my nail polish collection and spotted the perfect colour when I was out running errands on the weekend.  I'm absolutely in love with it.  It is Blue Me Away by Sally Hansen (Hard as Nails).
 I wore this colour for a day before I started fiddling.  I started with doing a simple top coat of Matte About You by Essie. 
I love the smooth, velvety look of a matte top coat on this blue but I wanted to take it one step further.  I used Special Effects by Nails Inc. and then added Matte About You over top.  I think it has an underwater, mermaid feel to it.  My camera didn't quite capture all of the colours in the Special Effects polish (I'll add a "sunlight" shot soon).

As promised in my last post, I've done my toes (sandal season! woohoo!).  I knew I wanted to do something colourful but easy.  So why not cover my toes in dots?  I used Fuchsia by Pupa, Orange by Pupa, Hit the Lights (yellow) by Nicole by OPI, One Time Lime by Nicole by OPI, Blue Me Away by Sally Hansen, and Cherry, Cherry, Bang, Bang (purple) by Sally Hansen.  All the polishes photographed true to colour except for the blue.  As you can see in the first picture, the blue slightly darker.
 I took my dotting tool (pencil with a straight pin stuck in the eraser) and just went to town adding dots.  It's a fun and easy design that can be touched up just by adding more dots!  I think next time I might try lining up the dots for a "fish scale" effect.
Happy Painting!
Love, Kate xo

Friday, 3 May 2013

Nautical Nails

Just a short post on this sunny Friday afternoon.  With the summer-like temperatures we have been getting, I decided to do a nautical nail design.  For the base I used "Ruby Pumps" by China Glaze and a royal blue shimmer (not sure the colour name) from Sephora by OPI.  I used white Kiss Nail Art Paint for the details.
To make the stripes, I waited until my nails were completely dry and then I cut thin strips of scotch tape and placed them on my nails.  I had very little paint bleed under the tape.  Here's the final result!
I hope you all have a fabulous weekend.  With all the wonderful weather we have been getting here, I'm thinking I need to do something really fun on my toes.  I'll be sure to share the final results! :)

Love, Kate xo