Showing posts with label Pupa. Show all posts

Saturday, 12 October 2013

Thanksgiving Plaid

Since it is Thanksgiving this weekend in Canada, I figured I should do a Thanksgiving themed design.  I'm kind of in love with the plaid trend in fashion right now and have been wanting to do plaid nails for a while.  So instead of doing a traditional turkey on my nails, I went with a plaid design in Fall colours.
For this design I used "Black Orchid" by Sally Hansen, "Blanc" by Essie, "Orange" by Pupa, and "Goldeneye" by O.P.I.  
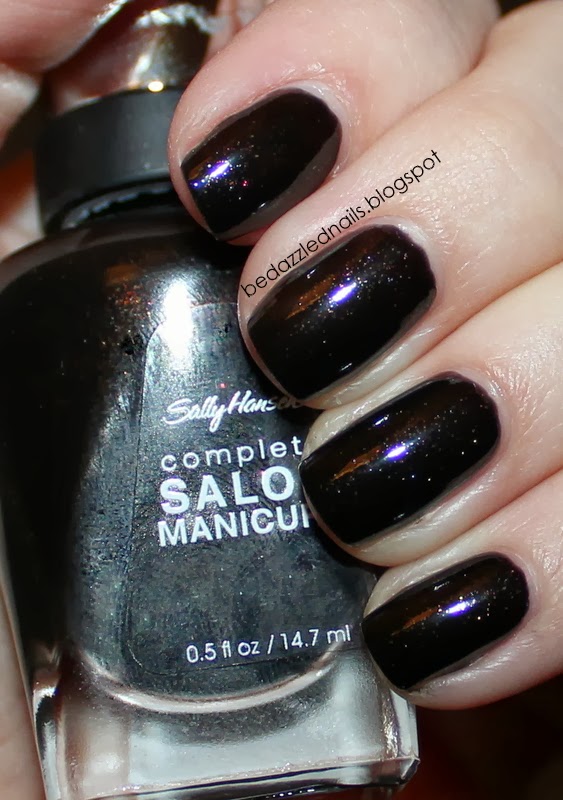
I started with a base of "Black Orchid".
I got my inspiration from a tutorial created by The Beauty Department.  I painted Scotch Tape and cut it into different sized strips.
I then placed the strips on my ring finger in a plaid design.  On my other nails I added metal stud stickers by Kiss.
Here is the final product!
I hope all my Canadian friends have a wonderful Thanksgiving weekend!

Happy Painting!

Love, Kate xo


Wednesday, 25 September 2013

Galaxy Nails

I've been wanting to do galaxy nails for a while now.  Ever since I saw the beautiful ones that Cristina at Let Them Have Polish did, I felt inspired.  For these nails I used "Midnight in NY" by Sally Hansen, "Eccentric Violet" by Pupa, "Pina Colada" by Covergirl, "Cherry, Cherry, Bang, Bang" by Sally Hansen, "Please See Me" by Sally Hansen, "Funky Limelight" by Essie, "Blanc" by Essie, and "The Donmar" by Nails Inc.
I started with a base of "Midnight in NY".  It's a nice black with multi-coloured glitter mixed in.
I then ripped small pieces off a make-up sponge and used tweezers to dip the pieces in the various colours.  I placed my polishes on a piece of parchment paper.  It makes for easy clean-up.  This is what my set up looked like. 
I dabbed the different colours onto each nail and tried to make them all look a little different.  When I was done, I found that they were missing a little something.  I decided to use my Nails Inc Special effects nail polish to add little holographic flakes.  I think it was the perfect addition.  Here is the final product!
I love how they turned out.  It ended up being kind of a psychedelic galaxy look!

Happy Painting!

Love, Kate xo

Sunday, 25 August 2013

Purplicious Triangles

Lately I feel like I've been doing a lot of designs that require a white base.  I've also be doing a lot of blue.  My goal this week was to do neither of those things.  I decided to go with a purple theme.  I used "Am I Making Myself Claire?" by Nicole By OPI, "Play Date" by Essie, "Red Purple" by Pupa, and "Silver Glitter" by Kiss.
I started with a base of "Play Date" by Essie. This is one of my favourite colours (I have a lot of favourites).
I cut small triangles of painters taped and taped off each nail.  I painted "Am I Making Myself Claire?" at the base of my nail and "Red Purple" at the tip of my nail.
I really like this look but the spots where the paint bled through the tape drives me nuts.  I wanted to use white dots to cover the lines but I really need a new white.  I decided to use silver to make dots, but the polish was a little too runny so it ended up making lines instead of dots.  It's not quite what I was going for but I don't mind the look. 
I still wasn't completely happy with the way it looked so I tried adding a matte top coat (by Essie).  I definitely think that the matte finish is better than the glossy finish but I kinda wish I had just touched up the spots that bled and left it alone.  It's all about trial and error! 

Which way do you guys like best?

Happy Painting!

Love, Kate xo

Saturday, 20 July 2013

Psychedelic Water Marble

It's been quite a while since I've done water marble nails.  The main reason I haven't done it in a while is because it's a little time consuming and messy.  I've been wanting to do one for a while now and finally got the time.  There is a great tutorial by Pack a Punch Polish.  For this design, I used White On by Sally Hansen, Fuchsia by Pupa, Orange by Pupa, Green With Envy by Sally Hansen, and Blue Me Away by Sally Hansen.  
This is one of my favourite colour combinations
 I started with a base of white.  When doing water marble, starting with a white base makes the colours much brighter.
 When choosing my polishes, I tried several different colours.  Some polishes just don't spread out when you drip them into the water.  To increase your success, use filtered water that is at room temperature.  Some people tape around their nails to keep their skin from getting polish all over it but I just find this time consuming.  Nail polish remover and a shower cleans up your fingers just fine.  When it came to dripping my polishes into the water I went "pink, orange, green, blue" 3 times. Here's the final product!
 My ring finger being more orange than blue was a happy accident (an unintentional accent nail).  I am so excited about how these turned out!
 Happy Painting!

Love Kate, xo

Monday, 6 May 2013

Double Post: A New Polish and Dotted Toes

I was missing a really vibrant blue in my nail polish collection and spotted the perfect colour when I was out running errands on the weekend.  I'm absolutely in love with it.  It is Blue Me Away by Sally Hansen (Hard as Nails).
 I wore this colour for a day before I started fiddling.  I started with doing a simple top coat of Matte About You by Essie. 
I love the smooth, velvety look of a matte top coat on this blue but I wanted to take it one step further.  I used Special Effects by Nails Inc. and then added Matte About You over top.  I think it has an underwater, mermaid feel to it.  My camera didn't quite capture all of the colours in the Special Effects polish (I'll add a "sunlight" shot soon).

As promised in my last post, I've done my toes (sandal season! woohoo!).  I knew I wanted to do something colourful but easy.  So why not cover my toes in dots?  I used Fuchsia by Pupa, Orange by Pupa, Hit the Lights (yellow) by Nicole by OPI, One Time Lime by Nicole by OPI, Blue Me Away by Sally Hansen, and Cherry, Cherry, Bang, Bang (purple) by Sally Hansen.  All the polishes photographed true to colour except for the blue.  As you can see in the first picture, the blue slightly darker.
 I took my dotting tool (pencil with a straight pin stuck in the eraser) and just went to town adding dots.  It's a fun and easy design that can be touched up just by adding more dots!  I think next time I might try lining up the dots for a "fish scale" effect.
Happy Painting!
Love, Kate xo

Friday, 3 May 2013

Nautical Nails

Just a short post on this sunny Friday afternoon.  With the summer-like temperatures we have been getting, I decided to do a nautical nail design.  For the base I used "Ruby Pumps" by China Glaze and a royal blue shimmer (not sure the colour name) from Sephora by OPI.  I used white Kiss Nail Art Paint for the details.
To make the stripes, I waited until my nails were completely dry and then I cut thin strips of scotch tape and placed them on my nails.  I had very little paint bleed under the tape.  Here's the final result!
I hope you all have a fabulous weekend.  With all the wonderful weather we have been getting here, I'm thinking I need to do something really fun on my toes.  I'll be sure to share the final results! :)

Love, Kate xo