Saturday, 5 July 2014

Ikat Dress Inspiration

 Two posts in two days!
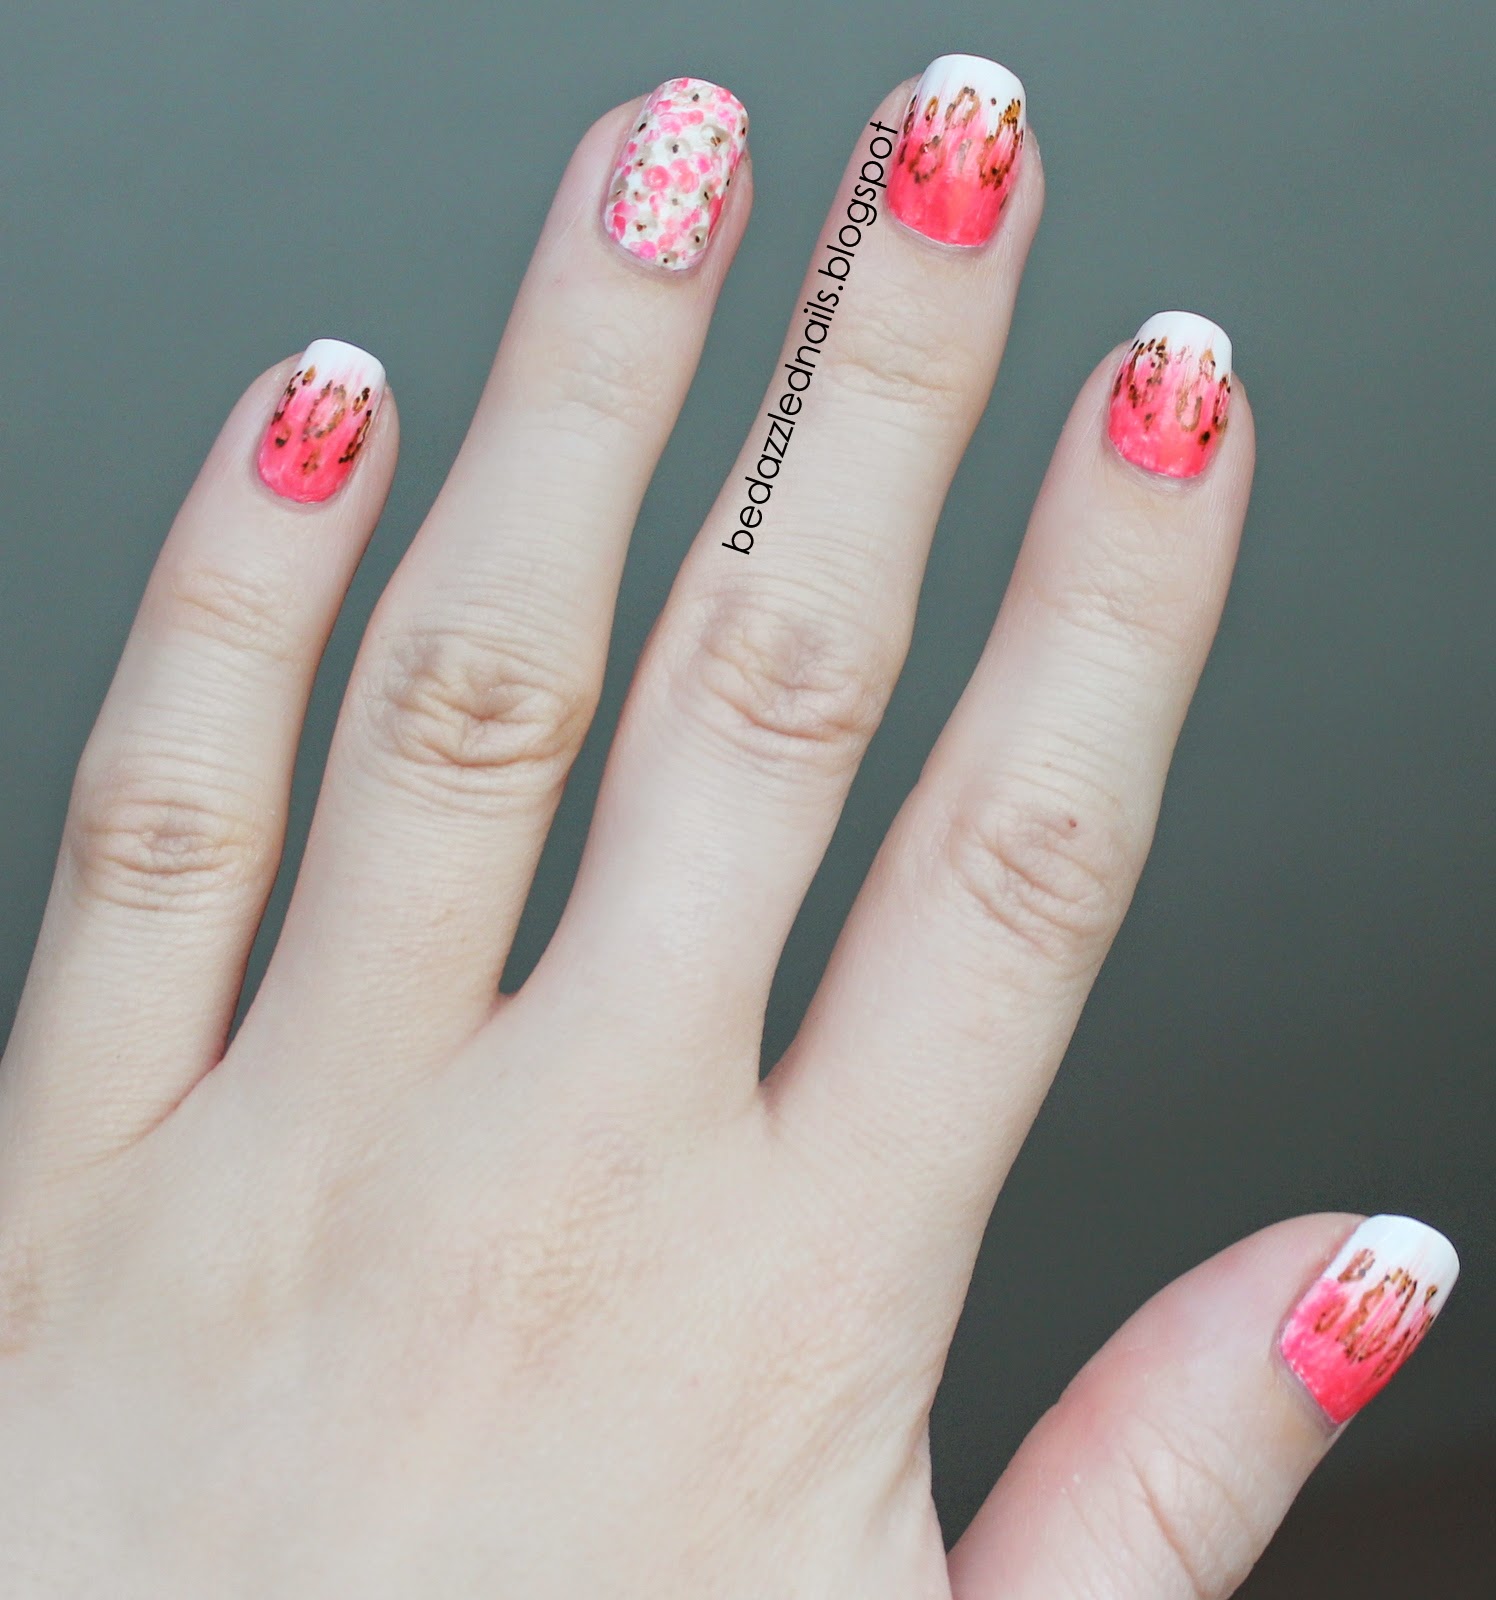
I wore a new dress to a bridal shower today and used it as an excuse to paint my nails to match my outfit.  I got this adorable hi-low dress last weekend and it's perfect for summer.  I fell in love with the combination of floral and ikat patterns.  I just knew that I had to use it as some nail inspiration.
For this design, I started with a base of "Blanc" by Essie.  I used "Cute as a Button" by Essie, "Fedora" by Sally Hansen, and a brown Bic permanent marker for the design.  To create the floral design, I thinned the coral and brown using acetone.  I then used a paint brush to apply the thinned polishes in a random "flower" design.  To create the ombre effect on the rest of my nails, I used a paint brush (not the brush from the polish) to paint the coral shade onto half of my nail.  I made sure to drag out the edges to create an ikat look.  Once my nails were dry, I used a Bic permanent marker to draw the brown shapes.  Finally, I slowly dragged my top coat over top to make the colours bleed. 
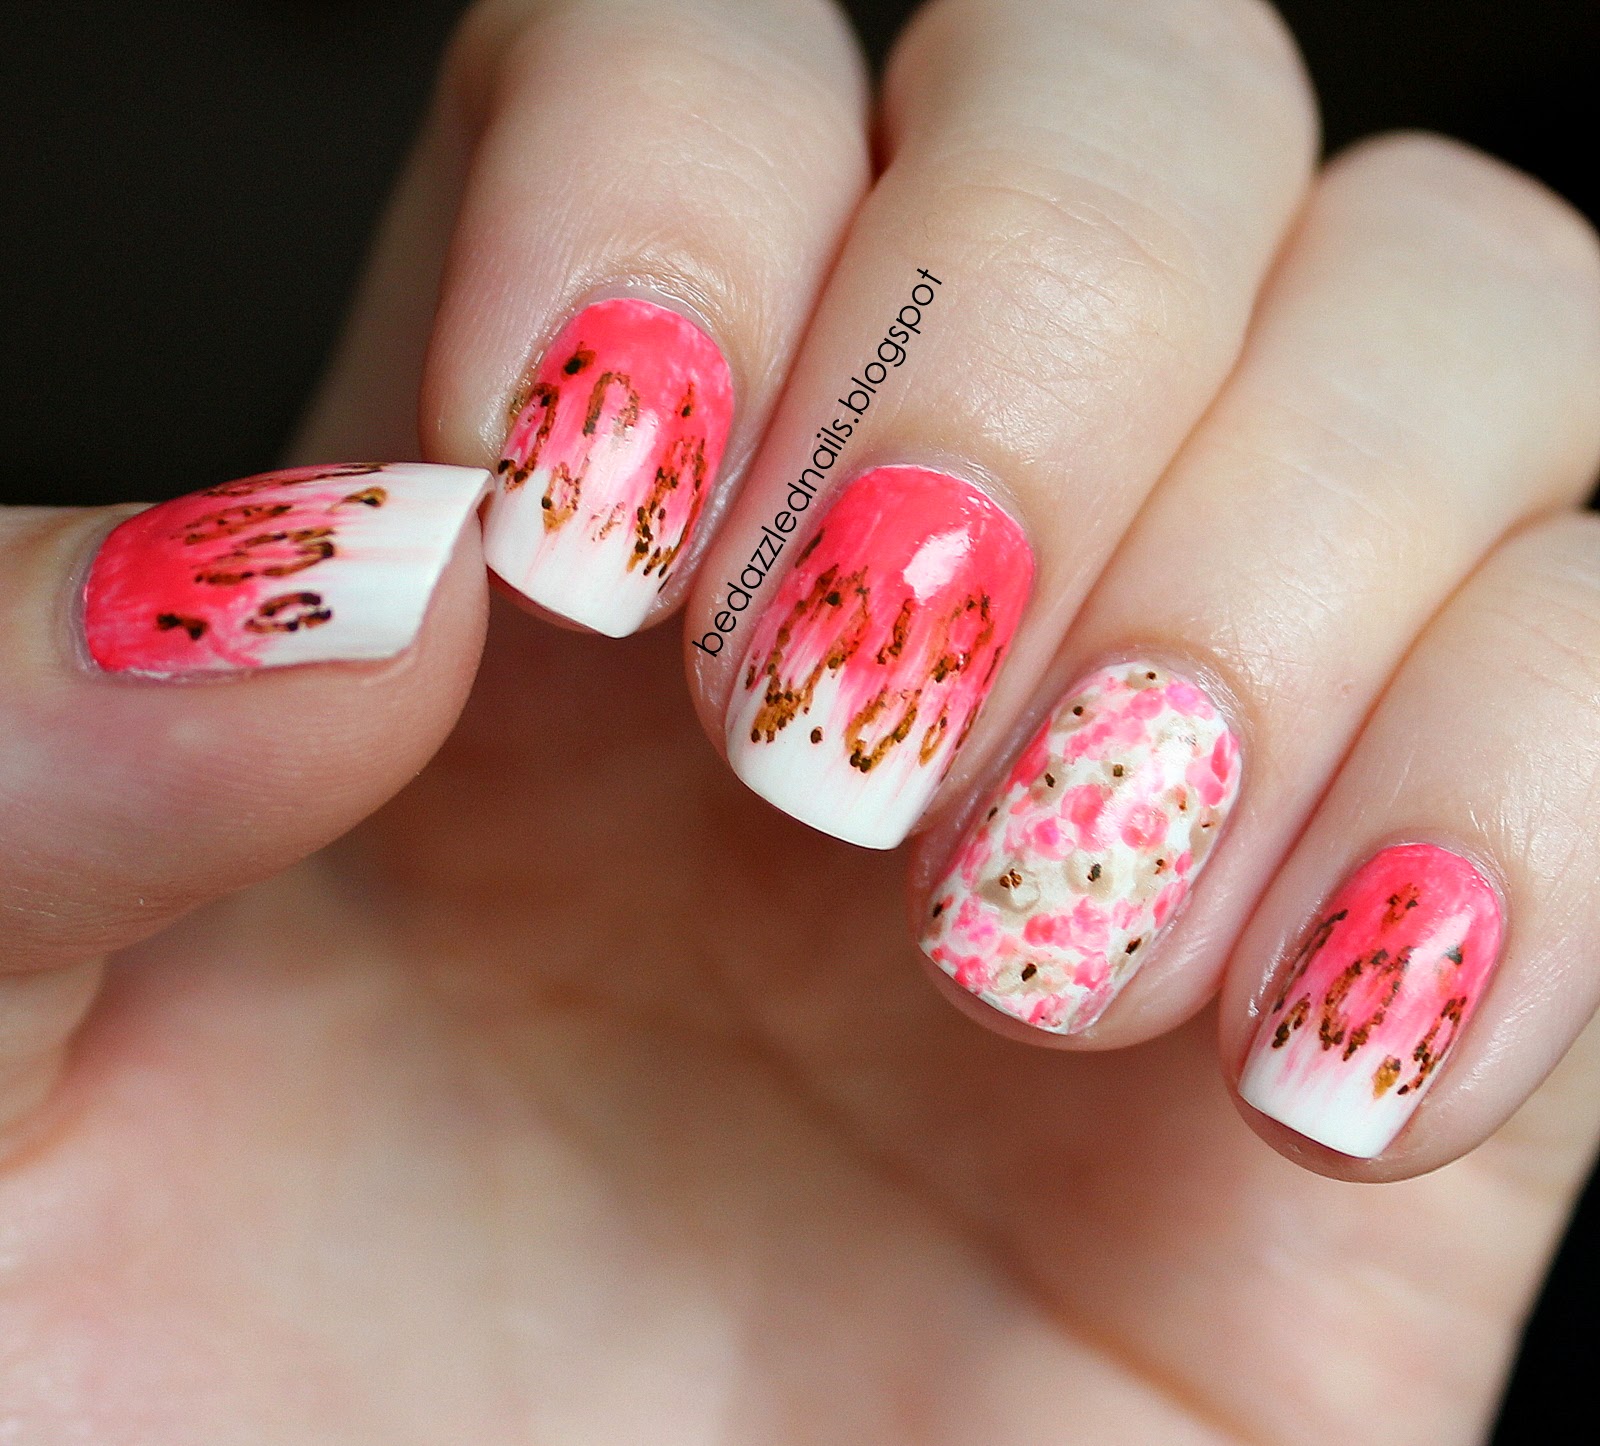
I'm so happy with how these turned out! You can bet that you will see a full floral design in the near future.

Happy Painting!

Love, Kate xo

Friday, 4 July 2014

Bras for the Cause

I'm back!! The last couple months of school are always busy.  Well this year was extra busy and my nails were definitely put on the back burner.  Now that summer has arrived, I can finally get back into nail design and it feels great!

Last night, my mom and I attended a Bras for the Cause event.  The idea is that you all decorate a bra and wear it on top of your clothes, all while raising money for breast cancer awareness.  Of course, I had to make sure that my nails matched my bra.

I started with a base of "Blanc" by Essie.  I then used Bic permanent markers to create my design.  I recently bought the pack of 36 Bic markers instead of the Sharpies because there was a greater variety of colours.  I created a "firework" design using pink, blue, green, orange, and yellow.  I created an accent nail by placing the breast cancer ribbon on my ring finger.  The result is a super easy, colourful, and fun design that I will definitely be recreating in the future.
Oh, I can't forget to include a shot of our bras!  You'll notice the "firework" design on the bands of the bras.

Happy Painting!

Love, Kate xo

Monday, 28 April 2014

Lacquer Legion: Glam

Each month, The Lacquer Legion puts out a theme and anyone is welcome to participate.  They are welcome to pick and choose which themes they want to participate in.  This month, I am participating for the first time.  
The theme: Glam.  First thing that came to mind was sparkles.  What's more glamorous than a little bling?  I really wanted to go for a classic glam look. 
For this design, I used "Sugar Daddy" by Essie and loose, silver, nail glitter.  To apply the glitter, I mixed it with a clear polish and used a makeup sponge to apply it to the tips of my nails.  My goal was to create falling glitter effect.  Here's the final product!
I'm so happy that I decided to participate in the Lacquer Legion challenge this month because I LOVE the way my nails turned out.

I encourage all to participate in the next challenge! You can find the Lacquer Legion on Facebook at facebook.com/thelacquerlegion.

Happy Painting!

Love, Kate xo

Sunday, 20 April 2014

Happy Easter!

Since it's Easter, I knew I had to do a decorated egg design for my nails.  I used "Blanc" by Essie, "Play Date" (purple) by Essie, and "Simply Divine" (pink) by Sally Hansen.  I started with a base of "Blanc" before sponging the pink and purple on in an ombre design.  I used white acrylic paint to create the final design.  I like to use acrylic paint for detailed work because it doesn't dry as fast as nail polish so you have a little more breathing room when creating your design.  I kept most of my nails simple with straight up polka dots.  On my ring fingers, I added straight and zigzag lines to make them look more like a decorated egg.  Here is the final product!
Originally I was going to use 4 colours (pink, purple, green, and yellow) but the pink and purple stood out much more than the yellow and green so I stuck with just the two colours.  I'm really happy with how they turned out!

Happy Painting!

Love, Kate xo

Thursday, 3 April 2014

Spring Ikat Chevron

My ikat chevron nails (see here) have surpassed 400 repins on Pinterest!! So in celebration, I have recreated the design just in time for Spring. 
For this design I used "Blanc" by Essie, "Appletini" by Covergirl, and "Stand by Your Manny" by Nicole by OPI.  Remember, the key to this design is the slooowly applied top coat which results in the perfect smeared look.
 Ikat chevron is definitely one of my favourite looks.  I'll be experimenting with more ikat looks in the not to distant future!

Happy Painting!

Love, Kate xo

Saturday, 22 March 2014

Nude Animal Print

I've become a really big fan of using Sharpies to draw designs on my nails.  It is such a quick and easy way to add some pizazz to your nails.  Just remember to spray a thin layer of aerosol hairspray over your nails (from a distance) before adding your top coat to prevent smudging.  You still need to make sure you apply your top coat quickly.  
For this design, I used the base colour from "Celestial Shine" by Revlon Sun Candy and a black Sharpie.  It's important to make sure your nails are completely dry before drawing with the Sharpie otherwise the marker won't apply smoothly.
Originally, I was going to apply the sparkly top coat over the leopard design, but I liked the way it looked without it.
I'm really happy with how these turned out.  The colours are subtle but the design is fierce!

Happy Painting!

Love, Kate xo

Saturday, 8 March 2014

Crazy for Polka Dots

Ok Winter, I'm done with you!  Spring, you can make your appearance anytime! I really needed a pop of colour on my nails to brighten my mood.  For this design, I used "Licorice" by Essie, "Hit the Lights" by Nicole by OPI, "Orange Oasis" by Covergirl, "Cherry, Cherry, Bang, Bang" by Sally Hansen, "Shrimply Devine" by Sally Hansen, "One Time Lime" by Nicole by OPI, and "Blue Me Away!" by Sally Hansen.  I used dotting tools of various sizes for my dots.  Here is the final product!
 
Originally I had another idea in mind for the other 3 nails, but I didn't like the way it looked.  I'm happy I decided to paint those nails black because it really makes the colours pop.  

Happy Painting!

Love, Kate xo